Whilst sorting my photos I found these instructions to make a simple pony pouch. There are lots of similar tutorials out there but this is how I like to sew the bags I keep my Julip horses in.
Originally on J-Club, July 2020 - With lockdown dragging I've been cracking on with storage/travel pouches
for all my Julips. I've improved some old ones and made some new ones,
so I thought I'd photograph the steps in case anyone else fancied sewing
one! Huge disclaimer that this is very basic, I'm sure anyone on here
could work it out, but it took me a few tries to find a method I liked
so I'm sharing it in case anyone needs some lockdown craft ideas.
To make one of these:
You will need:
- Cotton fabric (ideally not stretchy, with a fun pattern)
- Fleece fabric
- Bias binding
- Pins, needle & thread
- Scrap paper
Optional:
- Buttons
- Ribbons
- Improvised name tags
- Superglue
I hand-sew mine because I find it relaxing, but with a sewing machine you could make these faster and neater!
1.
First make a rough paper pattern. It depends how big your horse is -
the paper needs to be at least twice as long as the horse is tall, plus
about 6cm for the flap and hem. You need about this much at the nose and
tail ends to make seams:
So for example, for the New Forest Pony, my pattern is 36cm x 20cm (easy to make by taping two sheets of A4 together).
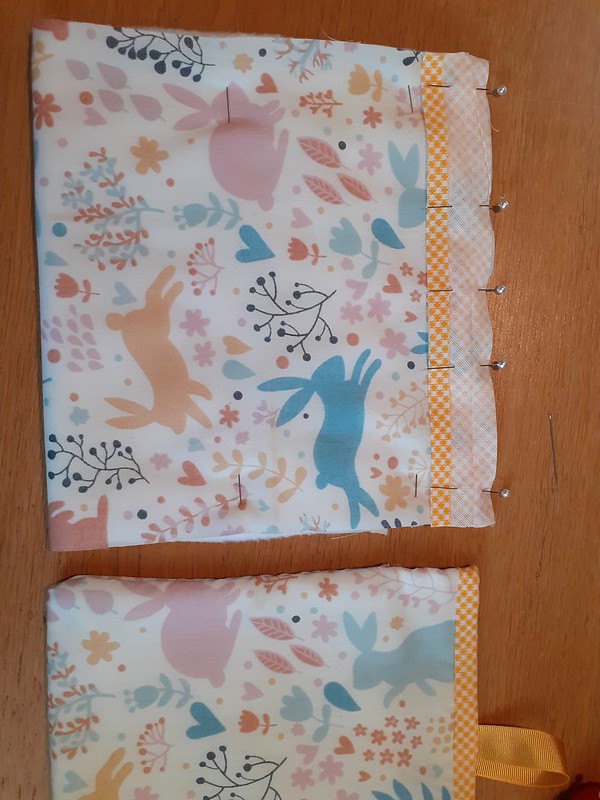
2. Cut rectangles of both fabrics. Your cotton should be about 1.5cm
longer than the fleece. Match them up and pin together. The overhanging
cotton should be at the TOP of your pattern if your fabric has a “right
way up”.
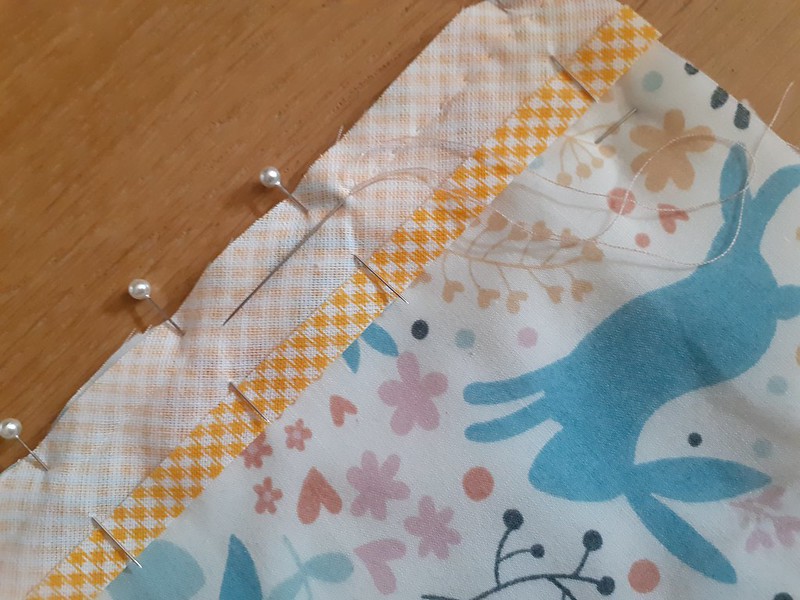
3. Fold the overhanging cotton back down onto the fleece and pin in place. Sew through the sandwich of fleece and cotton.
Hopefully this demonstrates which bit you’re making, the needle is in
place to sew the line described above – only go through one layer of
fleece though or you’ll sew your pouch shut.
4. Now turn the whole thing over and pin your bias binding to the other
free end, where the fleece and fabric line up perfectly. Start on the
outside (patterned fabric).
Close-up of sewing bias binding:
5. Now fold the binding over and sew onto the fleece lining. If you can
do proper bias binding, go for it. I hate fiddling with it and think
this looks okay, so I just sew it down like this. For this stage, don’t
sew all the way through, or your stitches may show up on the outside of
the pouch; just let your needle snag some of the fleece with each
stitch.
6. You should have something that looks like this, a rectangle with a
folded-over-sort-of-hem at one end and a line of bias binding at the
other.
7. Fold your pouch so you can work out where the folds should go…
8. ….then with reference to that, turn it inside out and pin it, making sure both fabrics are smooth.
9. Stitch up each side and back down:
I start down by the fold and leave a gap of about 1cm so the fabric has some room to move once we turn this right-side out.
10. Turn it right-side out! You may need to poke a pencil/blunt ended scissors into the corners.
11. Now I fold these little 45 degree corners into the binding at the
top and put a bunch of stitches all the way through to hold them in
place.
12. And follow up by folding that whole rough edge over, in line with
the side seam of the pouch, and sewing it in place. Don’t go all the way
through the fabric here either, just into the fleece layers.
13. When you’ve done both sides it should look like this:
To make the 45 degree corners lie completely flat you can dab a little
superglue under them and press them down, even if it’s the sort that
dries hard you won’t really tell between all that binding.
14. To add a button, fold the pouch in half to find the midline (marked with a pin here):
15. Stitch on this spot a few times to anchor your thread then add the button.
16. Close up the pouch and work out where your ribbon fastener needs to
go. Depending on the sort of ribbon you might want to fold it so it lies
flat or so it forms a fancy loop.
17. Sew the ribbon in place. Line the stitches up with the bias binding if you can.
18. Trim the ribbon.
19. I’ve started adding name tags either glued or sewn to the outside of
the pouch. Little wooden laser-cut shapes sold for card making work
well and you can write on them with marker pens. Or ribbons, embroidery
or cute buttons work too.
Now to make them for the rest of your ponies!
Apparently the pouches also attract bees…
Hope this has been useful or at least given you a laugh over how crazy being stuck at home has sent me!


Comments
Post a Comment